Here’s a simple, but great way to bind your own paperback books at home
If you like ebooks but don’t like reading them on your computer screen, this How-to post is for you. I’ll show you a quick and dirty book binding technique you can use to turn your ebook into a real book with about 5 minutes worth of effort. In fact, this is so easy, you might end up self-publishing your own books on demand for profit. If that’s the case, you owe me a copy.
Before we get started, I recommend you subscribe to my RSS feed so you don’t miss out on updates to this guide and other tips.
This process involves just a few basic steps, no sewing, or doing mini-binds (otherwise called signatures). The most time consuming part of this process is just waiting for glue to dry.First, the problem: How many times do you print up a book or detailed report only to lose some of the pages, or have them fall out of your hands and jumble the pages? Since ebooks can contain several hundreds of pages, it’s easy for accidents to happen. You can’t read them if there is any wind blowing. You can’t pull them out 5 minutes before a meeting and turn to your bookmark. Even turning the pages becomes annoying after awhile. That’s why you should consider this easy DIY project.
editor note: Hey, there’s now a full course on quick and easy at-home Bookbinding available!
For the eBook, I purchased the 37signals new ebook Getting Real The Smarter, faster, easier way to build a successful web application. I was watching a show on TV last night and got a bit bored so I chose to bind the book while I was watching. Aside from printing and glue drying, the whole process took about 5 minutes.
So are you ready? Here we go (click on any pictures to get a closer look)…
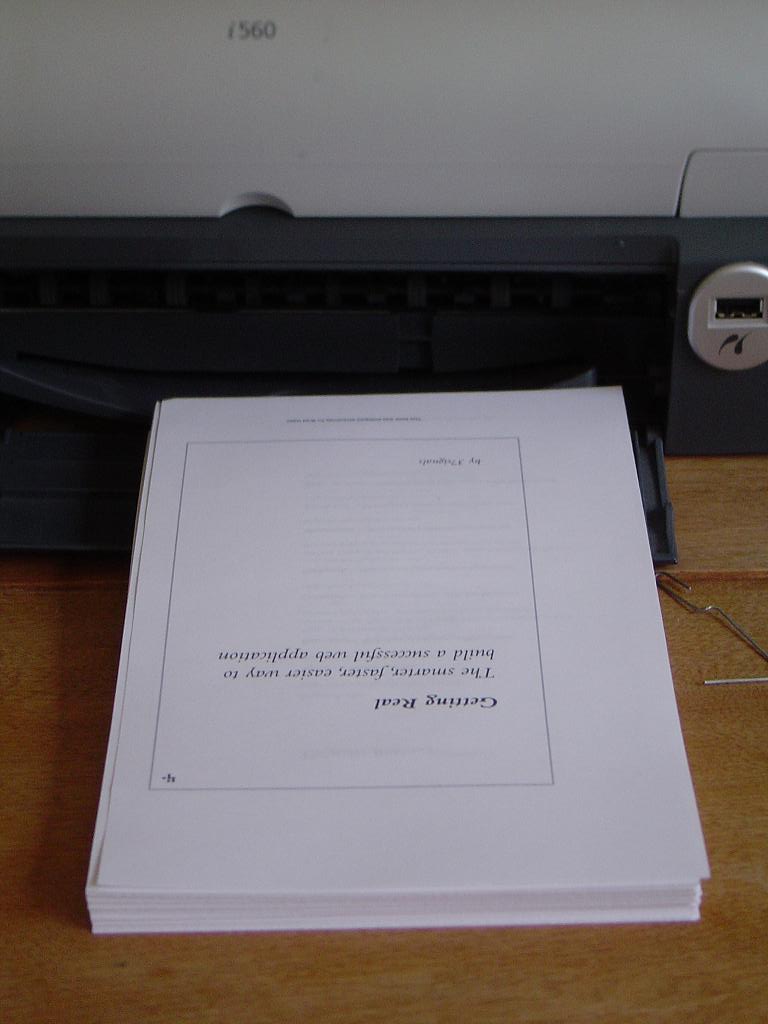 Print the ebook on A4 paper. A duplex printer really helps here. I actually get the full 8 1/2 by 11 sheets and cut them in half. Also, use a heavier 24lbs paper stock to avoid the ink bleeding through.
Like a deck of cards, grab all your book pages and tap them so all the sheets are flat and in line.
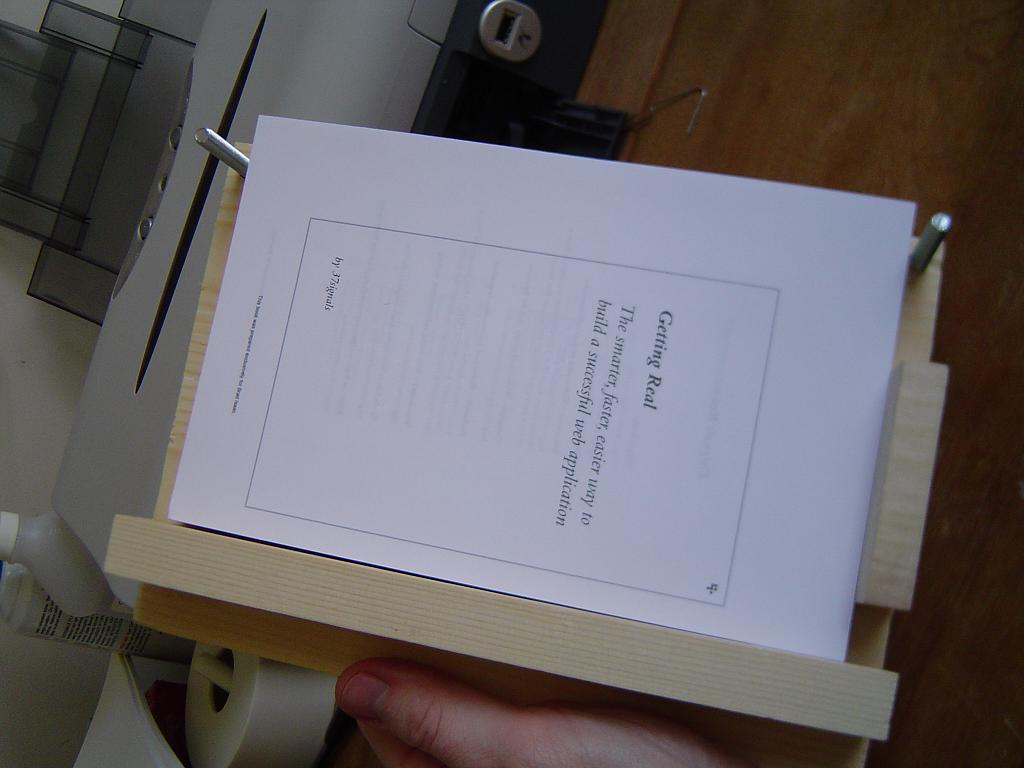 This is a simple book binder I built out of scrap wood. If you don’t feel
like building one, you can use a phone book to hold everything flat and
in line. Building a binder like this definately has it’s advantages.
First the two blocks of wood keep the pages in line on two sides.
Also, it’s very easy to clamp them using the clamp bar and wingnuts.
.
.
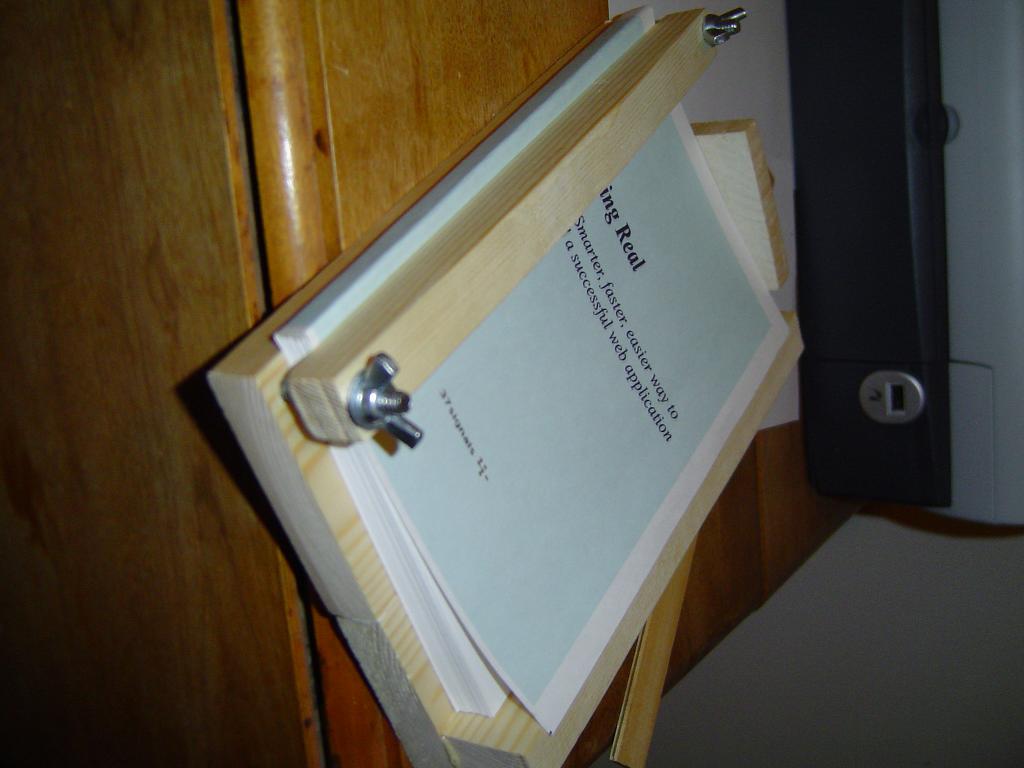
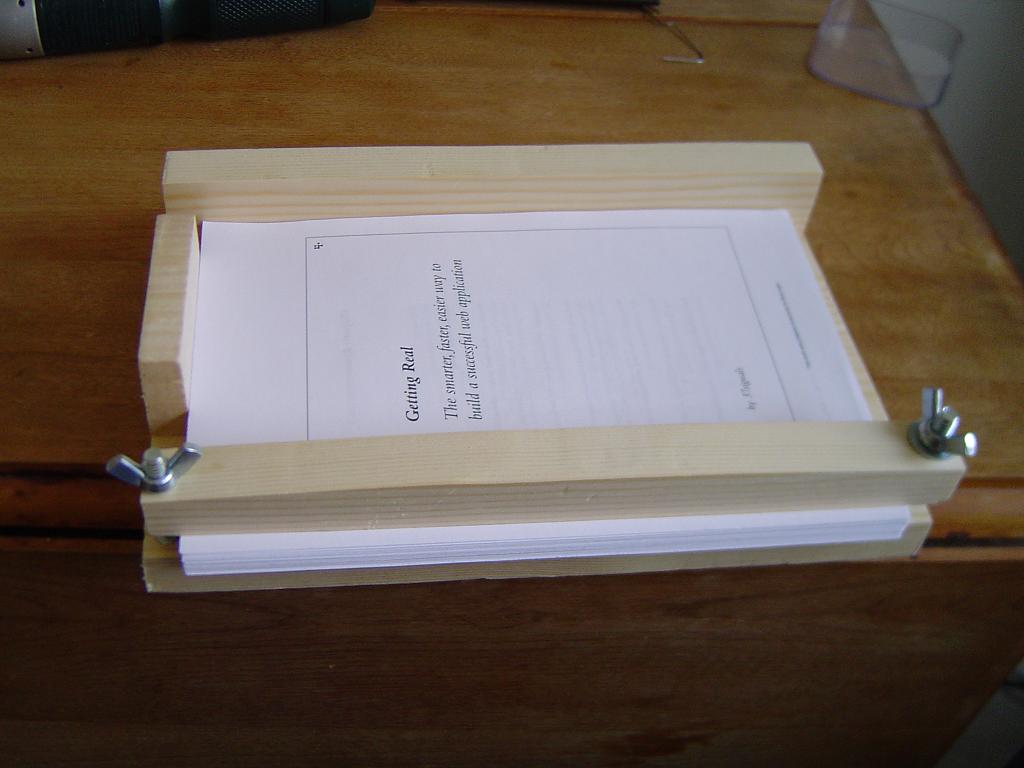 Here are all the pages in the binder, isn’t this pretty? I clamped them tight so nothing moves.
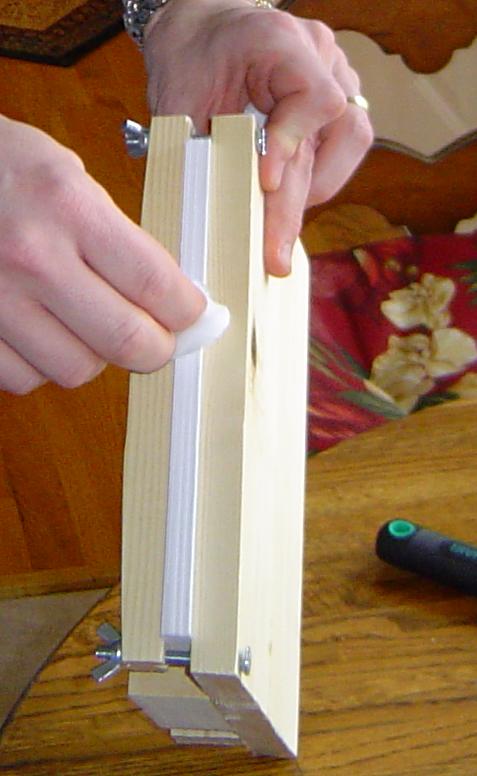 Wet the spine. I use Gorilla Glue
 to bind the books. It’s great for several reasons. One it expands and fills in any unintentional gaps. Two it holds firm and tight. Part of me wonders if pro binders use it because it’s so solid.
I use a cotton ball slightly wet with water to wet the spine. I make sure I make a pass or two over the spine so it’s damp.
Then I squeeze all the water out of the cotton ball and use it to apply the glue.
 While the glue is drying, I measure out the cover. Typically, I use some heavy card stock in legal size. Since I’ve done this so many times, I have a word template for printing the covers. If people want it, I’ll post.
It’s smart to go ahead and fold the edges of the cover before binding so it will fold over the pages without you having to strain. If you are going with pages 5 1/2 inches wide, then measure 5 1/2 inches and make a light mark on the cover. Then measure the width of the newly bound pages and mark there (In this case the page measure 1/2 inch.) Use a ruler to make the folds.
After the glue has dried, I loosen the wingnuts and insert the cover (back side) underneath the newly bound pages.
 After applying a touch more water and spreading glue to the spine, I fold over the cover and make everything tight. Then clamp it in the book binder.
You can see an overlap in the cover. I tend to cut too large so I can cut back..it’s better to have too much than too little. Now just leave everything to dry – overnight is preferable.
.
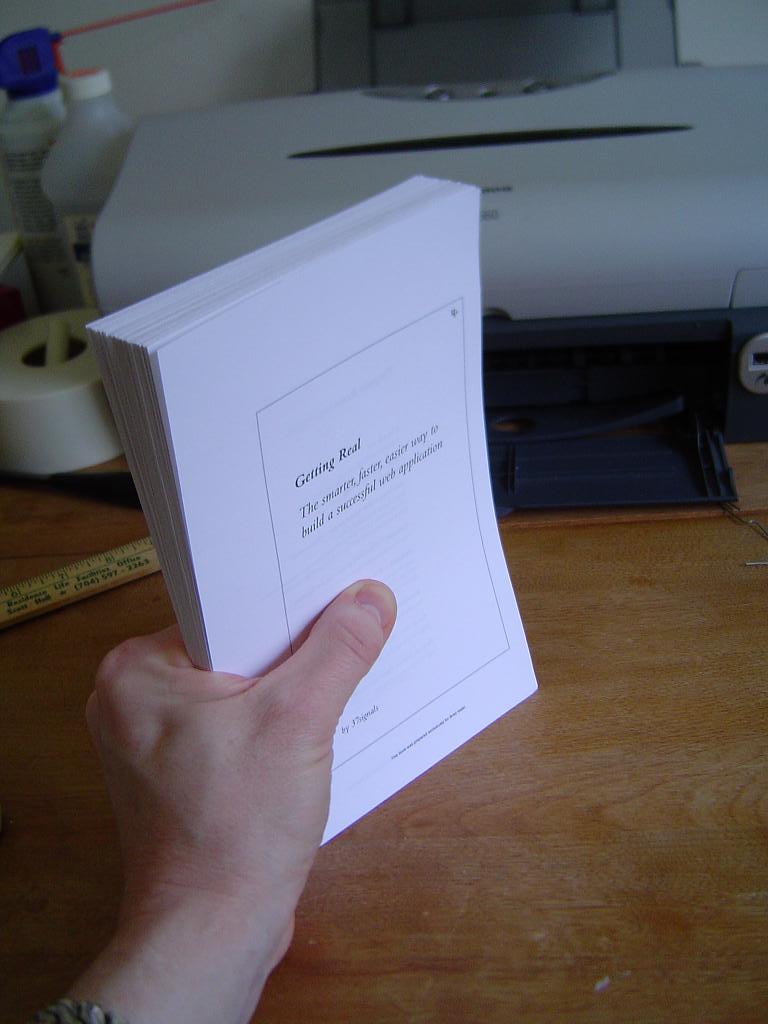
 Ok, it may look like I’m ready to sit down and read you a story…but I am demonstrating the toughness of the binding.
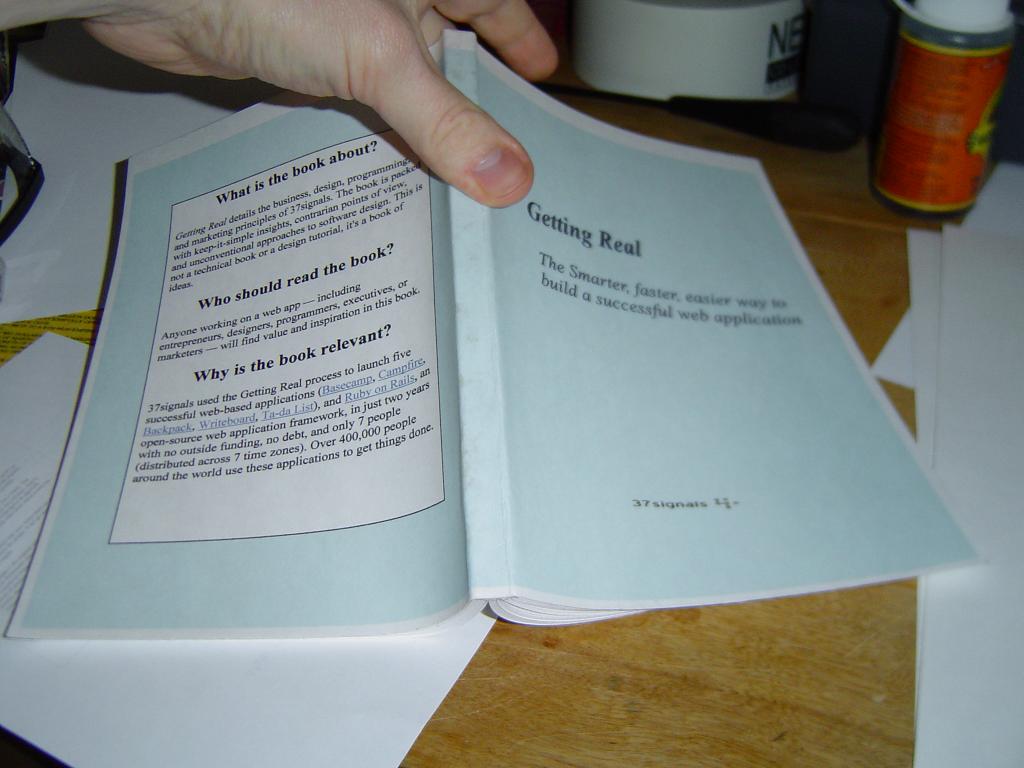 In this picture, I am really stressing the spine and binding. It still holds up and springs back into shape.
When I’ve told people I like to bind an occasional book, they often
remark that it must take a long time or be difficult. The benefit of
this method though is it really doesn’t take that much longer than
printing out the book – which is what most people do anyway. Since you
are printing it, why not go ahead and take the extra step and bind it?
Now that that’s done…I’m off to read. Be sure and post your questions and comments.
For more information on simple at-home bookbinding, grab the Easy Bookbinding Course by Nathan De Stephano


{ 149 comments }
← Previous Comments
Next Comments →
Wow, that looks really easy, I will have to give that a go, I wonder where I can get glue made from Gorillas
I freakin’ LOVE it! I used to work at a typesetter’s, and the owner kept blowing loads of sunshine up our collective asses about how ebooks would change the world and print was going to start to decline…and here we are, years later, writing tutorials on how to turn ebooks BACK into print books. Hey, Adobe, listen up: PDF is nice, but it ain’t sliced bread.
@Donovan, Amazon has gorilla glue”>Gorilla glue made from read gor… err polyurethane.
@MisterDevious, right. I recall reading that more books are printed and trashed since the invention of the PC than all of human history. Don’t quote me on that, just something I remember reading.
I’ve combed the internet for info on bookbinding in vain until alas ! , you came.
I love you.
OK, make some money: Sell the jigs! How much? You don’t want to see the things I make with wood!
I agree with Yaakov~! Sell us the jigs or teach us how to make them: )
Two years ago I went on the internet to find out how to bind, and had to BUY a book that explained pretty much the same thing…but your technique and glue recommendation is 100% more effective. The jig is the amazing part of your technique.
You are a gift to humanity for publishing this! I wish all of mankind were as generous.
This is a great guide you’ve put together!
I’ve been working to make some guides to help people publish themselves from home, too, and just wanted to add them here, if I may.
First, I’m now producing my novel from home as a perfect-bound paperback thanks to a nice guy in Florida named Chet Novicki who sells hand-binding presses through his website. I’m not associated with him in any way, just grateful that he’s made this product available.
- Gigabooks.net
Before getting into perfect-binding, I was making hardcover books, which, strangely, is actually easier to get into, as you can do it with common materials. It is, however, much more time-consuming.
Here’s a guide I made recently called (sorry, coincidence) Quick-n-Dirty Bookbinding (the links lead to PDFs):
- Quick-n-Dirty Bookbinding, A4
- Quick-n-Dirty Bookbinding, Letter
And, finally, a while back I wrote an article for the NoMediaKings website that contains just about everything I’ve learnt about running a press from home. Here’s that article:
DIY Press
Sorry for all the off-site links. My intention here isn’t to steal anyone’s thunder, but to give back to the community of people who are creating their own unique culture. I’m all about that.
Happy publishing!
wow this seems like its very easy… i gotta go get some paper for the covers and the glue… thanks for this guide!
Gorilla Glue can be found at most “Ace Hardware and True Value ” Stores.
Another source might be “Home Depot”
@Felix, the feeling’s mutual – in a friendly way that is
@Yaakov, hmm… I’m not cut out for the assembly line type of stuff, but maybe I could get my kids to earn some rent money.
@Tina, good idea for the tutorial. I’ll see if I can put something together. Can’t promise it will be soon as this is a busy week.
@Chris, glad you like it. Thanks for stopping by and taking time to comment
Ok… Let’s see if I can help everyone build the clamp.
When you brake it down to the parts it’s really easy.
You can use pine/plywood (one side Good, (The paper side))
or MDF board. (Might be MFD… can never remember this one)
Part List:
Base Plate: 1″X10″X6″
Back Stop: 1″X2″X10″
Side Stop: 1″X2″X4″
Clamping Bar: 1″X1″X10″ (Option: 14″ to give you a handle)
Bolts: 2– 1/4-20 X 3″ or 3-1/2″ Carriage Bolts
Washers: 2– 1/4″ Flat washers
Nuts: 2– 1/4-20 Wing nuts
A bottle of “Gorilla Glue”
Now with the base laying 10″ left to right — Measure in 5/8″
from the left edge and from the front edge; mark and drill a 1/4″
hole, then repeat on the right corner.
Next Take your clamping bar and center it over the two holes and
flush with the left edge — clamp in place and drill thru from the back
of the base plate.
Next turn the base plate around and using the “Gorilla Glue” glue
the 10″ long stop block making sure the 2″‘s is up and all edges are
flush.
Next center the 4″ stop block on the left edge and glue that in place.
Last step… insert the carriage bolts then put a flat washer over the bolt
and the wing nut and tighten it down to “pull” the square head into
the board.
You’re “DONE”!!! You now have you clamp.
Enjoy!
That is actually really neat, untll e paper come a viable reality this is a great solution
Thanks for sharing!
Inventor, thanks for posting your method for building the jig.
Great post. I wish printer ink was less expensive though. I cringe at the tought of printing a 500 page e-book and how it would substantially reduce my ink levels.
Thank you for sharing this great technique! This will be very useful for me!
thanks so much for this post.
I just printed and bound my first book!
I built my own frame out of three cheap sticks of wood. It’s basically an “L” shape with a groove to hold the paper straight. Once the pages are lined up, I use two C clamps and another stick of wood, to apply pressure.
The advantage to the L shape is that you have flexibility in the size of your books.
Thanks for the post!
You all are most welcome! . Thanks for stopping by and posting.
@Miguel, the 500 page book would basically be 125 pages since 4 pages fit onto one sheet. It’s not so bad if you think of it that way. Now, a self bound book using 500 sheets of paper would be 2000 pages…
@Chris, which book did you bind? You might want to consider upgrading from the C clamp method. I found it took a lot longer to get the wood lined up right and the clamps tended to push the paper off center
I love you man! I’ve been looking for weeks for something like this.
Hi,
I was just wondering at part of your isntructions. When you say :”After the glue has dried, I loosen the wingnuts and insert the cover (back side)”, but you don;t say how long it takes the glue to dry at that stage while later you mention leaving it over-night. It loooks like its about 5 minutes, but it could be an hour, in anycase its hard for a novice to know when the glue is actually dry.
Would love a bit of guidance on that point.
thanks,
Greg
Very nice! Thanks for sharing your info. I have a question about the glue – you say Gorilla Glue is PVA, and that PVA expands and fills in the gaps. I read from another website that Gorilla Glue is better than Elmer’s Glue. However, [url]http://www.elmers.com/msds/me375_c.htm[/b] says that Elmers Glue (Glue-All) is also PVA, although it’s listed as “PVAC based adhesive”. So, is Elmers Glue different from PVA-glue?
Whoops, sorry, the link is [url]http://www.elmers.com/msds/me375_c.htm[/url]
Thank you so much for this. I already knew most of the basics (clamp the pages, glue them, etc), but this gave me a few details that I hadn’t found before, such as what sort of glue to use (the other sites said plain school glue, but Gorilla glue will probably work better), and you actually gave a PICTURE of the jig to clamp the book. The other sites just said you could make a special clamping machine, but gave no pictures or instructions on how to make it. Thanks for the pics, they’ll help me a lot! I’m also going to try experimenting with tacky glue (craft stores carry it almost in surplus). My aunt used to use it for crafts, and it works on just about everything; I’ll let you know which works best.
Hi
Thanks for the fantastic information.
I’m having a bit of trouble with the Gorilla Glue (which is available on Ebay, if you’re having trouble finding it , by the way) which spread unevenly between the book cover and the outside two pages of the book. The result is a wobbly looking mess on left the first page of the book when you open it, which is hard to miss. (Also on the last page, of course, but that’s not quite as obvious).
I presume I’m using too much of it, or getting something very wrong. Could you clear up how much to use and how to avoid messy blobs on the first and last pages where they join the cover?
Thanks again. Love the simple bookbinder jig design.
Eric, it does sound like you are using too much. gorilla glue expands so a light coat is enough. Which is another reason for the wet cotton ball, use it to lightly apply the glue, you should barely be able to see it with the exception of a light shiny coat.
The other sites just said you could make a special clamping machine, but gave no pictures or instructions on how to make it. Thanks for the pics, they’ll help me a lot!
I should say, I didn’t originally include specs for the clamp because I thought you might want to use different size paper for your books.
Quote:
I thought you might want to use different size paper for your books. UnQuote
That’s why I made the instructions as simple as I could, so everyone could
easily build the clamp.
If they needed a bigger clamp they could just increase the length and width
of the base board to fit the paper size.
I also thought about describing an adjustable model, (One size Fits All), but
was afraid it would confuse to many of your ‘mechanically challenged’ readers.
Just repeating above post to get a reply:
[quote]you say Gorilla Glue is PVA, and that PVA expands and fills in the gaps. I read from another website that Gorilla Glue is better than Elmer’s Glue. However, [url]http://www.elmers.com/msds/me375_c.htm[/b] says that Elmers Glue (Glue-All) is also PVA, although it’s listed as “PVAC based adhesive”. So, is Elmers Glue different from PVA-glue?[/quote]
Also, I got some PVA glue from a bookstore that says its for arts and crafts. Unlike Elmers, this glue is thicker and there are bubbles inside, however, it does not “bubble and expand” upon application. So is this PVA glue, or isn’t it?
Finally, on applying glue, I found out that too much water makes the glue “seep in” more, and the pages do not open as beautifully as when you put on “just enough” glue. A very slight swipe with damp (not wet!) cotton ball does the trick. However, I once applied glue WITHOUT damping the spine, and it worked out well all the same — so I guess wetting the spine is just up to you.
In addition what what Ice said, if you use too much water it will seep into the cover where the spine is and look messy.
Really great. Put a paper cutter on one side of the board and sell it as a book binding kit in Staples. Sure would beat the stuff they have now.
Craig, interesting idea. Might be dangerous though especially if you mistake the blade for the clamp arm.
Have you checked out this place http://trubind.myshopify.com ? They can do it for you very professionally and pretty cheap.
I’ve used them for a couple copies of ebooks and the product is professional quality.
Ice, Gorilla Glue and Elmer’s Glue are completely different. Elmer’s is, indeed, a PVA (Polyvinyl acetate) glue. Gorilla Glue, on the other hand, is a polyurethane glue, not a PVA. When dry, gorilla glue is ph-neutral. PVAs, generally, are not ph-neutral, so you’ll get yellowing over time with elmer’s (there are ph-neutral PVA glues available if, though).
Thank you so much for this info. I am an genealogy nut, and have been looking for away to put my many different lines [some more than 500 pgs] into a book form, to have hard copies and to be able to share with other family members and libraries. Again thanks alot.
Brad, great idea to post this! How is the longevity/ durability test doing? Are your initial books still holding up stoutly?
swordbender, the books I’ve done have held up without any problems
Barbara, that’s a great idea..for making books for your family. Good luck with that.
What might be suggested for repairing/regluing of large format paperback bound magazines?
Brad, do you leave the book in the binder over night? Gorilla glue says that it dries 90% in about 20 minutes, and 100% in 24 hours. So I’m just wonering if you let the newly bound book dry for 24 hours and if so, if you leave the book in the binder for the entire time or if you take it out after the 20 minute required time and then set a weight on the spine or something.
Landed unintentionally on this site and caught my interest cos I’ve been doing this binding stuff for quite some time now. I would like to share a trick or too I use. I clamp the sheets (usually in a carpenters’ vice) only at the end opposite the spine. But it can be done in your clamp too. Put the clamped sheets at the end of a table and put a heavy weight on them. Then bend the sheets down as far as possible and in this way a real small margin in every sheet is exposed. Glue that (I use Elmer’s). Very quickly turn everything upside down and repeat. It helps if the glue is slightly diluted instead of wetting the spine. Then clamp the whole thing real tight.
How important is the clamping? Does it make a great difference if the pages are tightly clamped while being glued, or just laid on a table with a book on top while being glued?
(incidentally, if you are in the UK you’ll find Gorilla glue for sale on eBay)
Hugewally : If I understand correctly, I’d use a razor and cut out the pages I wanted and then use the method above to bind em
Todd: the glue dries much faster on paper. So I just leave it sit there a few minutes and then take it out and place it under another book
Joe, hadn’t thought of diluting the glue first, good idea.
Chris, you can do just fine with a large phonebook or dictionary. I like the clamp because it keeps glue from wedging itself inbetween the sheets of paper
thanks so much! this is great for us academic types who are always printing out journal articles. i tried this with 8 1/2 by 11 pages & some heavy books, and used a green hanging file folder as a cover. It works great – the perfect size, very durable, all you need to do is cut off the plastic hanging tabs. The only downside is that you can’t print on it.
Quick question…in case I may have skipped this important info somewhere: How exactly do you plan the printing of a long document? Creating the individual signatures seems confusing. Thanks.
I’m having trouble finding 8-1/2 x 14 cover stock. Where can I buy it.?
Hey Hamish MacDonald
Your Quick – n – Dirty bookbinding pamphlet is neat, but you’ve got some sort of wierd collating thing going on.
Either include some info on how to read it, or just put it in consecutive order.
As it is, you cant read the pamphlet on how to bind books, untill you bind it into a book.
Catch – 22
Hello there, I tried your idea for building a jig…what a great concept…I love it. My brother who is a professional woodworker made some adjustments to it that made it even better. I’d love to send you some pics of the adjustments that your welcome to share with the others if you want them. Bro made it so you can do any size book you want on one jig. I tried it out….it’s so easy. I think we should call it “Binding for Dummies”…what’cha think? *L* email me if you want the pics
Hi Sandy, I’d love to see the pictures. email sent
Fantastic post Brad. THANK YOU. I am very excited about this as I use handmade journals as a part of a workshop I do. My husband is going to make me a jig this weekend and your method will make my journal making segment 1000 times easier! I am very interested in Sandy’s brother’s idea for an adjustable jig so am waiting anxiously to see if she posts that!
HAPPY NEW YEAR and thanks again for sharing so freely your wonderful idea.
@Manifestation Journal Maker glad you like it.
I am so booked up right now I haven’t had a moment to post the jig. Alot of my writing is remotely.
Excellent information. I am interested to see the modified jig Sandy was talking about as well. I have a question about binding handmade paper and was wondering if anyone has tried this process on handmade paper and how it has turned out?
← Previous Comments
Next Comments →
{ 28 trackbacks }