If you have a large family, you may have tried the family newsletter to share current “goings on” in your family with everyone in your extended family. Sharing a newsletter with everyone can be fun, informative and helpful to distant relatives who may be indisposed. However, the traditional paper, stamp mailer newsletter suffers from several different flaws.
1. Difficult to edit
2. Can be centered on only one small portion of the family
3. Cost money for stamps, paper and envelopes
For these reasons you may want to consider using AWEBER (aff. link) auto responder to create a dynamic family newsletter where everyone can easily contribute, share and enjoy. It is the service I’ve been using for 2 years and IMHO it’s the best.
Here’s how to create a family newsletter:
First, small business owners probably already have an autoresponder set up. If so, you can create a sub account under your main account. If not, you can simply create a new account here.
This tutorial will demonstrate how to do it with AWEBER. But other auto responders should work similarly.
Setting Up the Newsletter
In this part, you’ll create the structure of your newsletter and email address within your auto responder software.
Step 1: Under the Home menu item, choose “Add New” link.
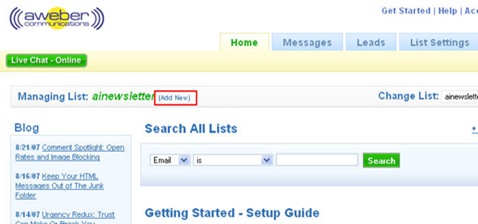
Step 2: Hit the Create List button
![]()
Step 3: Choose an obvious name in case you end up running more than one newsletter. I recommend you choose your family name as the title of your newsletter.
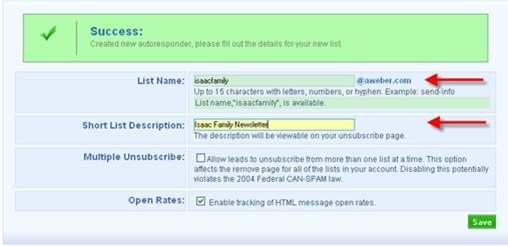
Step 4: Choose a standard title for your newsletter. In the software, it says Company Branding. Ignore that and set it up for your family. 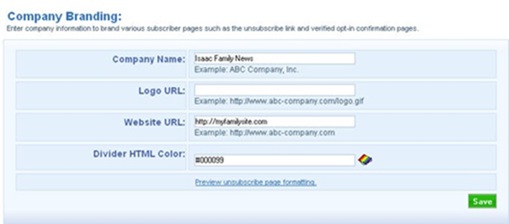
Tips:
Don’t pick a name that is humorous
The Isaac Family Ledger is a safe bet, whereas a funny title like The Isaac Family Tattler will make some family members wary of it. Your relatives don’t want to think they are being spied on. The title of your newsletter will either be inviting for participation or will dissuade people from reading and participating. Choose something standard and you’ll be ok.
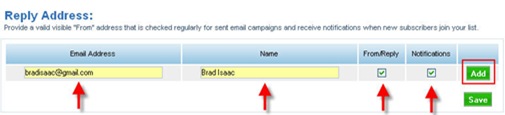
Enter a Reply address (a real address where your family can easily get in touch with you.)
Step 5: Creating the Welcome Message
When your family members subscribe to your newsletter, it’s good to have a nice welcome message. It will be delivered within 5 minutes of them subscribing. Therefore, you will want to have this message ready BEFORE you ask people to subscribe.
Go to the List Settings tab and choose Verified Opt-in

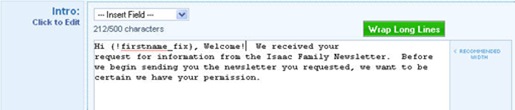
Step 6: Personalize your message. You can go with the default setup, but I like to personalize this message. One of the cool things about Aweber is the way to tailor each message to each member of your list the {!firstname_fix} variable will make the list member’s first name appear in it’s place.
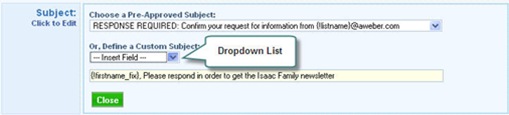
Step 7: Customize message text. I also recommend you customize the message text as well, remind them to click the link otherwise they won’t be subscribed.
Note: After you create your customized subscribe message there is a delay while it’s being processed.

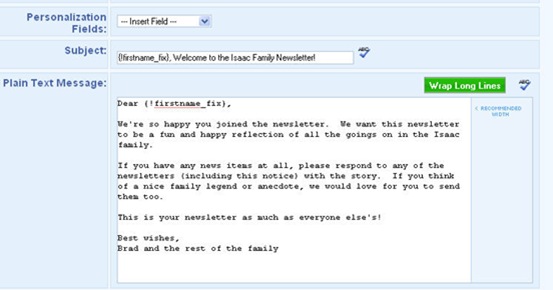
Step 8: Creating The First Follow Up Message
After your family starts subscribing to your newsletter, it’s a good idea to put a message welcoming them to the letter.
Start by going to the Messages tap and choose Follow up

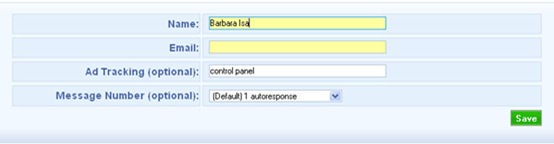
Prepare the List of subscribers
Step 9: Add names and emails 
Tips before creating your first newsletter:
- Remember many email filters block emails that use too much HTML and flashy graphics
- Keep in mind, older family members may have trouble reading odd fonts or type on backgrounds other than white
- Ariel font is a safe bet with a white background.
Create Your First Newsletter
Now we’re at the fun part. It’s time to create your first newsletter!
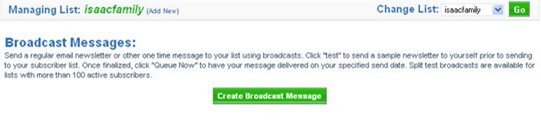
Go to the Messages tab and click “Broadcast message” Then press the Create
Step 10: Click the Broadcast Message button.
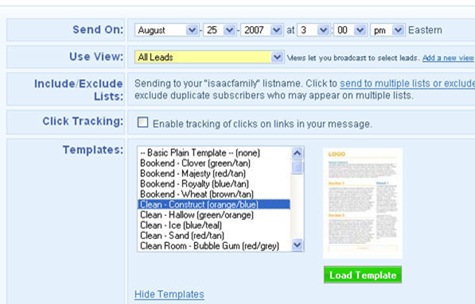
Step 11: Choose your newsletter format
You can pick a date and time ahead of time to queue the message. Or if you want to send it ASAP, leave the time setting alone.
1. Choose All Leads to reach all of your family
2. Click tracking is used if you will be linking to a web page or an email address. If you are curious about what people are clicking on, put a checkmark in this box.
3. Pick your Theme. Keep in mind your great granny might be reading the newsletter and her aged eyes would do better with simple themes and fonts. Thus, I recommend the following settings:
a. Ariel Font
b. White background
c. Minimal graphics
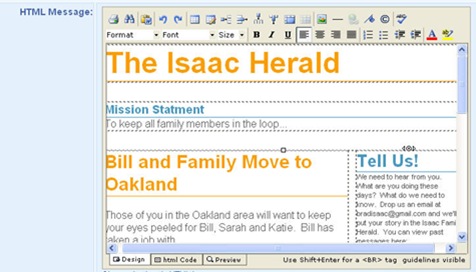
Step 12: Now you can begin composing the stories in your newsletter.
You can use text formatting or full html. HTML looks better, but sometimes gets blocked by email filters. However, with family, you can follow up after the first message or two to make sure everyone got it. So, HTML might be a fun way to go.
More settings: Before sending your message, you might want to put a checkmark in the RSS/HTML feed box. This will set up a page where all of your newsletters will be archived on a website. It is a free addition to the Aweber package and is a good option unless your newsletter gets too personal. The archive pages are not password protected.

Step 13: Send your newsletter
After you have completed your first message, you are ready to send. I recommend you click the Test link (see below) and email yourself a copy. When you get it, did everything look ok? If so, queue it up!

Overall, I hope your family newsletter becomes a fun and informative way to keep in touch with one another.
More info: http://www.aweber.com


{ 14 comments }
I am a huge aweber fan….great product and service. Nice little tutorial here!
Is there a free service similar to this one as well? I see that this one has a monthly charge. Great service by the looks of it though.
I’m not aware of a free solution but Aweber is well worth the money.
Nice Site. I am new here but will be visiting more often as you have done a good job.
Thanks
Aweber is a great emailing tool and pays for itself if you learn to use it effectively.
@Michael, yes there is a monthly charge but its worth it. Their service it fantastic. Thanks for the tutorial. I am gonna digg this for others.
hey, love the blog – i will try and keep up with it!! please keep more coming I wish I could start a blog but I don’t have much time
  Thanks, nick
thanks for the great tips
i tried once using autoresponder
it seems to be harboring lot of spammer since they know you are active
Hi, if you’re looking for a free autoresponder, don’t forget to look into your host services, usually, even with a cheap hosting, you get dozains of tools like stats, email redirect, fantastico install panel, and some autoresponder!
sounds like its much easier than snail mail using this family newsletter tool. thanks for the article
interesting.. will try this on my blog.. thanks man!
You know, I never thought about doing a family newsletter. I just built a Blog for family to stay updated, but this seems to be much easier. Oh well, will do both. Thanks for the Good Idea !
Thanks for your tips. I will try this one.
I never thought about doing a family newsletter. good nice
{ 1 trackback }